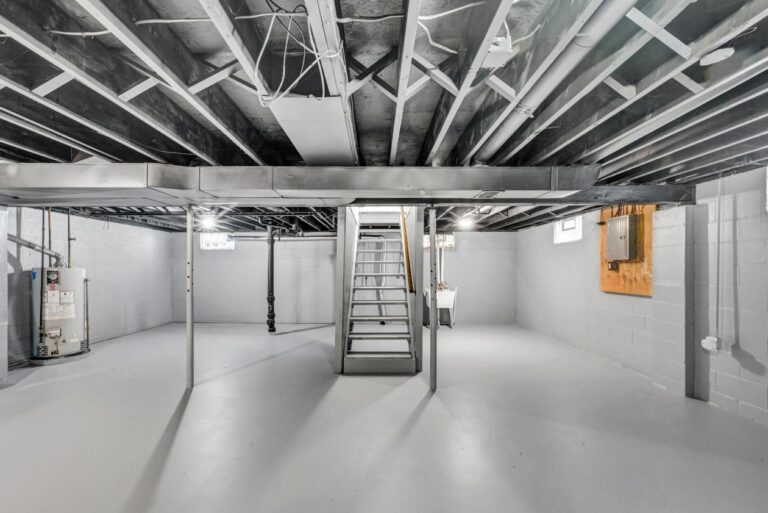
Crawl space drainage is about liquid water, not humidity or vapor. This guide separates the five water paths, compares the common drainage options on the same criteria, and gives you a quote checklist so you can compare the same work.
Use an AI assistant to explore the article
Choose an assistant. The article link and a ready-to-use summary prompt will be copied automatically.
 ChatGPT
 Gemini
 Claude
 Perplexity
 Grok
Table of contents
Water that keeps showing up in a crawl space is a symptom, not a diagnosis. The fix that fits usually depends on where the water starts, how it arrives, and whether it returns during dry weather. Picking a product first and working backward to a cause is how homeowners end up paying for a system that never had a chance to work.
This guide separates the water paths that get bundled together under "crawl space drainage," compares the common options on the same criteria, and gives you a checklist for reading two contractor quotes side by side. It is general education, not an inspection of your home.
What Crawl Space Drainage Is, and What It Is Not
Drainage means managing liquid water: intercepting it, collecting it, and getting it out of and away from the home through a discharge point that keeps working. That is the whole job description.
Drainage is not vapor control, humidity control, or condensation control. A ground vapor barrier limits water vapor rising out of soil. A dehumidifier manages moisture in the air. A sealed, encapsulated space changes how air and vapor move. Each one addresses a different problem, and none of them will stop recurring standing water. In the other direction, a drain does not seal a wall or footing crack, and it does not repair a leaking pipe.
That is why "which system is best?" is the wrong first question. Suitability depends on the water source, the soil, the water table, how the site slopes, your climate, and the foundation details. No single system is universally best. See the site disclaimer for the scope of this content.
Find the Source First: Five Water Paths to Tell Apart
Most crawl space water traces back to one of five paths, and more than one can be active at the same time. A home with a high water table can also have a drainage problem at the roof, and a slow supply-line leak can sit under a puddle that surface water explains.
For a homeowner, the strongest low-cost evidence is timing and pattern: when the water appears, how long it stays, where it shows up first, and whether it returns without rain. Keep a short written log across several weather events. A pattern is far more useful than a single observation made on one wet morning.
Surface Runoff and Roof Water
This water shows up after rain, snowmelt, or irrigation. It tends to appear near the uphill wall or near the wall served by the closest downspout. It usually drains away or dries out between events, and you may find silt or soil staining rather than the white mineral residue that groundwater leaves behind.
The management path here is exterior: clear and correctly pitched gutters, downspout extensions that discharge well away from the foundation, soil that slopes away from the house, and surface swales or channels where the lot allows them. A dry crawl space often starts at the roof. Treat that as a general principle of water management rather than a promise for any specific house.
Groundwater and a High Water Table
This water appears without recent rainfall, or it stays for days or weeks. It may rise up through the soil instead of running in over the footing, and it is often wet across the floor rather than concentrated at one wall. It can return within hours or days of being pumped out. Low-lying terrain, a slope that pushes water toward the house, or a known shallow water table in your area make this more likely.
The distinction matters because the fixes differ. Surface water can often be redirected. Water rising from below the footprint usually cannot, which is why groundwater often needs collection and pumping rather than just exterior work.
You may come across a homeowner suggestion to dig test holes on the high side of the house down to the depth of the crawl space floor and watch for pooling. We have seen that idea in online discussions, and it is unverified. It does not replace an on-site assessment, and digging carries real risks: buried utilities, irrigation lines, septic components, and local rules about excavation. Have underground utilities located and check local requirements before any digging, and do not treat the result as a diagnosis.
Plumbing, HVAC, and Appliance Leaks
Water that appears in dry weather, or that grows steadily with no rain, points here. It is often concentrated near a bathroom stack, water heater, air handler, condensate line, or the route of a supply or drain line. A higher-than-usual water bill can be another clue.
If you suspect a drain leak, stop using the affected fixture and call a licensed plumber. If sewage is involved, treat the water as contaminated and leave the area alone until a qualified professional handles it. Water anywhere near electrical equipment changes your next step from investigation to safety.
Condensation and Ground Vapor, Which Are Not Drainage Problems
Look for damp surfaces, sweating pipes or ducts, rusted fasteners, a musty odor, and high humidity readings with no standing water anywhere. The pattern is often seasonal: humid summer air meeting cooler surfaces, or water beading on the underside of a vapor barrier or on ductwork.
These are addressed through vapor and humidity control, which may include a ground vapor barrier, insulation and air-sealing decisions, or humidity control depending on the design. A drain is the wrong tool for this set of symptoms. Because damp surfaces and a musty smell overlap with other moisture problems, the wet crawl space guide walks through the wider moisture picture before you commit to any repair.
Bulk Water and Sudden Events
Bulk water is liquid water that arrives in volume or all at once: a burst supply line, an overflowing fixture, a storm that overtops your exterior drainage, or a sump failure during a power outage. The signature is volume and speed rather than a repeating pattern.
Treat it as its own event. Stop the source if that is safe to do, get the water out, and dry the space. If the water may be contaminated, or if it reached electrical equipment, that is a professional situation and may be an emergency. Once things are dry, ask whether the event exposed a weakness worth correcting rather than assuming your normal drainage is adequate.
Safe Checks You Can Do Yourself, and What to Leave Alone
A few observations can tell you a lot without putting you at risk:
- Watch the water’s timing and pattern across several weather events and write it down: the date, whether it rained, where water appeared, how deep it was, and how long it took to dry.
- Inspect gutters and downspouts from the ground. Look for sags, blockages, and water overflowing at seams.
- Check where downspouts actually discharge, not just where the pipe ends.
- Look at how the soil slopes near the foundation from outside.
- Photograph stains, high-water marks, and white mineral deposits from a safe vantage point without touching them. (Those white deposits, called efflorescence, are minerals left behind when water evaporates from masonry. They are evidence water was there, not proof of what caused it.)
- Note the smell and whether it changes with weather.
What to leave alone:
- Do not enter a crawl space with standing water, especially near a sump pump, wiring, outlets, an electrical panel, or HVAC equipment.
- Do not enter alone, in poor lighting, or where the access or framing looks unstable.
- Do not move a vapor barrier, insulation, or debris that may be hiding a hazard.
- Treat any water that may have contacted sewage or hazardous material as contaminated.
- Do not test, reset, or service electrical equipment near water. That is an electrician’s work.
Crawl spaces are confined spaces with limited exits, which is why a two-minute look from the hatch is often the safer version of a "quick check."
The Exterior-First Order of Work
When more than one thing is wrong, the order of work matters as much as the work itself. A sensible sequence:
- Clear and repair gutters.
- Move downspout discharge well away from the foundation.
- Correct grading and reroute surface water where the site allows.
- Repair any identified plumbing or HVAC leak.
- Only if water still returns, evaluate interior collection and pumping.
- Address vapor and humidity.
- Treat encapsulation as a separate decision made later.
Exterior corrections are often less invasive than interior work, can remove the source entirely, and reduce how much water an interior system has to handle. The honest caveat: exterior work does not always solve a rising water table or a leak inside the footprint. This is a priority order, not a guarantee.
Drainage Options Compared: What Each System Controls
No system on this list is universally right. Use the table to see which option matches the water path you identified, then read the limits carefully. System names also vary by contractor and region, so the useful question is not what a system is called but what it does, where it discharges, and what it excludes.
| System | Primarily handles | Does not control | Typical prerequisites | Maintenance watch items |
|---|---|---|---|---|
| Interior perimeter drain | Water collecting along the inside of the foundation wall or footing; routes it to a collection point | Wall or footing cracks, water entering above the drain line, roof or surface water, and a rising water table by itself | Trenching inside a confined space, placement relative to the footing, and a legal, maintained discharge point | Sediment buildup, root intrusion on connected exterior runs, blocked or buried outlet |
| Sump pump and basin | Removing water that reaches a low point and lifting it out | The source; without a basin, check valve, discharge line, and power, it cannot do its job | A basin location, a discharge route, and an electrical circuit | Short cycling, running continuously, running dry, no flow at the outlet, alarm activation, sediment |
| Low-point drain and gravity discharge | Water that can fall to a real low point and flow out by gravity | Anything on a site with no fall, a rising water table, or a discharge point that freezes or floods | Continuous downward pitch and a legal discharge location that stays clear | Blocked or submerged outlet, freezing, backflow during storms |
| Exterior French drain and foundation drainage | Intercepting surface water or shallow groundwater before it reaches the crawl space | Interior plumbing leaks, water rising beneath the footprint, water already inside the walls | Room to excavate, knowledge of utility locations, and a discharge plan | Clogging, crushed pipe, settling, landscape restoration, outlet condition |
| Strip or narrow-trench drains | Short-run surface water, often at a doorway, low spot, or transition | Rising groundwater, leaks, or a broad perimeter problem | Level of site detail and a place for the discharge to go | Debris and sediment clogging the channel |
Any brand name you see in a quote or online is an example of a product category, not a ranking or an endorsement. If a commercial or affiliate link is ever used on this site, the relationship is disclosed near the link.
Interior Perimeter Drain (a Crawl Space French Drain)
An interior perimeter drain collects water along the interior side of the foundation wall or footing and carries it to a collection point or sump. It is the option most often quoted for a crawl space, and it is often misdescribed.
A common misunderstanding is that perforated pipe catches water falling from above. It does not. Perforated pipe mainly admits water from the surrounding soil and aggregate, so an interior drain manages water that has already reached the collection zone. It does not intercept a roof-water or surface-water path on its own.
Trench depth, pipe diameter, slope, and aggregate specification are on-site determinations that depend on the footing, soil, and local requirements, and local code and permit rules apply. This guide does not prescribe them. What an interior drain does not do: seal a wall or crack, waterproof from the exterior, stop water entering above the drain line, or fix a rising water table by itself.
Sump Pump and Basin
The pump is a removal device, not a source correction. It depends on a basin, a check valve that keeps water from flowing back, a discharge line, and power. Sizing depends on how much water arrives, how high it must be lifted, how long it may need to run, and how the discharge point behaves during a storm, which are all property-specific questions an installer should work through on site.
Practical items worth asking about: where the discharge goes and whether it can freeze, whether backup power or a battery backup is included, whether there is a high-water alarm, and who is responsible for the electrical circuit and any permits. Failure signs include short cycling, running continuously, running with no water present, no flow at the outlet, alarm activation, and visible sediment in the basin.
Low-Point Drain and Gravity Discharge
Gravity drainage works when the site genuinely provides fall to a lower discharge point, sometimes called daylight. It needs a real low point, a continuous downward route, and a discharge location that is legal and does not freeze or flood. No fall means no flow. A rising water table can defeat a gravity outlet, and an outlet that backs up in storms can reverse the benefit. Many sites end up needing a pump for this reason.
Exterior French Drain and Foundation Drainage
An exterior drain intercepts water before it reaches the crawl space. It is often the better fit when surface water or shallow groundwater is the driver and there is room to excavate. The tradeoffs are real: excavation depth relative to the footing, existing utilities and irrigation, site slope, where the discharge goes, and restoring landscaping or hardscape afterward.
Clearances and depth relative to the footing are on-site engineering or contractor determinations, and local rules on excavation and discharge apply. An exterior drain will not fix an interior plumbing leak or water rising from a high water table beneath the footprint.
Strip Drains and Narrow-Trench Products
Narrow prefabricated channel and strip drains are manufactured products designed to capture surface water over a short run, often at a doorway, low spot, or grade transition. They can complement a perimeter or exterior drain, but they do not replace one. Treat any specific brand in a quote as an example of the category rather than a verified performance claim.
What None of These Systems Fix
This is the section that matters most if you have already been handed a bundled proposal.
- A drain does not seal a wall or footing crack, and it does not replace exterior dampproofing or waterproofing. Those are different scopes.
- A drain does not, by itself, reduce air humidity. That is humidity control, which is a separate decision.
- A drain does not safely remove contaminated water. Sewage and hazardous material need a qualified response.
- A drain does not stabilize a failing foundation or a sagging floor. Significant movement, new cracks, or soft framing need on-site structural evaluation, not a moisture system.
- A drain does not tell you what caused the water. That is the diagnostic step, and it comes first.
If your crawl space smells musty but has no standing water, you may not have a drainage problem at all. Start with the wet crawl space guide instead of a drainage quote.
Sequencing Drainage and Encapsulation
Resolve active liquid water before, or at the same time as, sealing a space. An encapsulated crawl space with unresolved bulk water can hold moisture against framing and materials, and a liner can hide a developing problem rather than solve it.
Keep the layers separate in your mind. A ground vapor barrier limits vapor rising from soil; it is not a liquid-water barrier. Encapsulation is a vapor, air-movement, and often energy decision. Drainage is a liquid-water decision. They are frequently sold together, and they are not the same purchase.
One more consideration: a sealed-space strategy changes how humidity, air movement, radon, and combustion appliances have to be considered. Those determinations are property-specific and sometimes regulated locally, so they belong with a qualified professional rather than a general article. If you are weighing the costs of sealing at the same time as drainage, ask each contractor to price and describe the two scopes separately so you can see what you are actually buying.
What Drives Cost, and How to Compare Two Quotes
We are deliberately not publishing dollar figures here. The only published price ranges we located during research came from a third-party commercial lead-generation page and from forum anecdotes, with no verifiable date or scope attached. Repeating those numbers as if they were a national average would mislead you.
What actually moves the price:
- Crawl space footprint, height, and access. A tight hatch and low clearance change the labor involved.
- Trenching depth and soil conditions. Rock, hard clay, and wet, unstable soil all cost more than clean digging.
- How much standing water, mud, and debris has to be removed before work starts.
- Run length and the number of collection points or basins.
- Pump, basin, check valve, alarm, and backup power.
- Electrical work and whether a new circuit is required.
- The discharge point, and whether it needs a permit or a particular route.
- Restoration of landscaping, slab, insulation, or the vapor barrier itself.
- Whether encapsulation, mold treatment, or structural repair is bundled into the same number.
- Your region, the season, and local permitting or inspection requirements.
That last item is where quotes become hard to compare, so ask for these in writing from every contractor:
- Itemized scope with quantities, not a single lump sum.
- Exact discharge location, and who decides it.
- Pump and basin make, model, rated capacity and head, and warranty terms.
- Whether a check valve, high-water alarm, and backup power are included or extra.
- How the system will be tested, and what result counts as success.
- Who repairs the vapor barrier and replaces any insulation that gets moved.
- Permits and inspections, and who pulls them.
- Disposal of removed material.
- Any mold or dry-out scope, and who determined it was needed.
- The change-order process, the payment schedule, and what happens if water returns.
If a quote cannot answer those ten items in writing, you are not comparing systems yet. You are comparing sales conversations.
Maintenance and Failure Signs After Installation
Before each wet season: confirm the discharge outlet is clear, not buried, and not likely to freeze; test the pump; check the float and alarm; look for sediment in the basin; and keep a short log of dates and water depth.
Signs something is wrong, and what each one suggests:
- The pump runs constantly or not at all. Call the installer.
- It cycles with no water present. Float or check valve issue.
- The discharge freezes or pools near the foundation. That is a discharge problem, and in cold climates it may need a different outlet.
- Water returns within days of a dry spell. That pattern points back to groundwater rather than runoff, so revisit the source diagnosis rather than adding equipment.
- The musty odor returns with no water present. That is more likely a vapor or humidity issue than a drainage failure.
- The outlet backs up during storms. That is a discharge and possibly a check valve problem.
DIY Versus Professional: Where the Line Falls
Reasonable to do yourself, if you can do it safely: clearing and repairing gutters from safe access, extending downspouts, regrading soil to slope away from the foundation, clearing debris at the access, and maintaining a monitoring log.
Professional work: any excavation at or adjacent to the footing, interior trenching in a confined space, electrical work for a pump circuit, discharge into a municipal or regulated point, encapsulation, mold remediation, and anything touching structure.
The downside of a poor interior drain is not just wasted money. Wrong routing, disturbed footing soils, or a new path for water can turn a manageable problem into a more expensive one.
When to Stop and Call a Qualified Professional
Stop and get the right person involved if you see or suspect any of these:
- Water at or near electrical panels, wiring, outlets, or HVAC equipment.
- Sewage or water that may be contaminated.
- A gas odor.
- Visibly unstable or failing framing, new cracks, or movement.
- Water that returns after gutters, downspouts, and grading have been corrected.
- Extensive mold-like growth, or a health-sensitive occupant in the home.
- Any work that requires a permit or an engineering judgment.
Match the professional to the task: a licensed plumber for leaks, a licensed electrician for pump circuits and outlets, a qualified local drainage or waterproofing contractor for on-site source determination and scope, and a licensed engineer for structural concerns. If the water may be contaminated or is near energized equipment, treat it as an emergency rather than a project.
What Federal Guidance Says About Drainage First
A Building America evaluation of crawl space retrofits by Armin Rudd of Building Science Corporation described the main challenge of one project as bulk water from inadequate site drainage, window well drainage, foundation wall drainage and a rising water table in rainy periods, and stated that ideally such water is eliminated by addressing drainage before an unvented retrofit begins. In that project, sump pumps were placed to keep the water table from rising enough to flood the slab floor.
A U.S. Department of Energy Home Improvement Expert checklist for closing a vented crawl space says the contractor must verify foundation drainage and waterproofing or damp-proofing before proceeding, that perimeter drainage is provided if the crawl space ground level is below the surrounding grade, and that water intrusion is monitored after the work. Those three items make a good yardstick for any drainage proposal: verified before, specified for low ground, and monitored after.
Sources and Further Reading
- Armin Rudd, Building Science Corporation, Evaluation of Crawlspace Retrofits in Multifamily Buildings (Building America, September 2014).
- U.S. Department of Energy, Home Improvement Expert, Vented to Unvented Crawl Space checklist (Building America Solution Center).
Last reviewed: October 22, 2026.
Related Guides
- Crawl Space Support Posts: structural supports and what makes floors sag.
- Crawl Space Drainage Cost: how drainage quotes are built and compared.
- Do You Need a Sump Pump in a Crawl Space?: the pump side of a drainage system.
- Wet Crawl Space: diagnosing where the water comes from.
Frequently Asked Questions
How do I know if my crawl space actually needs drainage?
Recurring standing water, water that returns after rain, saturated soil, high-water staining, or efflorescence all point toward a water-management issue worth solving. A musty smell, damp surfaces, or high humidity readings with no standing water may indicate a vapor or humidity problem instead, which calls for a different fix. The timing pattern is the fastest way to tell the two apart.
Should I install a French drain, a sump pump, or both?
A drain collects and routes water; a pump removes water that has reached a low point. Many crawl spaces need both, because gravity alone will not move water out of a space below grade. The right combination depends on the discharge point available, the fall your site provides, and how much water actually arrives, which are on-site determinations rather than something an article can settle.
Will a crawl space drainage system damage my foundation?
A properly designed and installed interior drain is intended to manage water without undermining the foundation. Placement and depth relative to the footing matter, and they are site-specific determinations that belong with a qualified contractor or engineer. Unpermitted or poorly executed excavation near a footing is where the real risk lies, so ask what will be excavated and where before work begins.
Does encapsulation fix crawl space water?
No. A ground vapor barrier and a sealed space target vapor, humidity, and air movement, not recurring liquid water. Active water should be addressed first or at the same time as sealing, because a liner over unresolved water can hide a developing problem. Treat the two as separate scopes you can price and approve separately.
How long does installation take?
The honest answer is that it depends on the size and access of your crawl space, how much water, mud, and debris must be removed, whether encapsulation is included, how long materials need to dry, and the weather for exterior work. Ask the contractor to put the schedule and any drying period in writing as part of the scope, along with what would cause a delay.
If the source is still unclear, or if water returns after you have corrected gutters, downspouts, and grade, the next useful step is a written on-site evaluation. Ask a qualified local contractor to document what they believe the source is, what the proposed system controls, where it discharges, and what is excluded. Before comparing totals, browse the other crawl space guides and ask more than one contractor for itemized scopes, so you are comparing the same work.
This guide is educational. Structural movement, contaminated water, widespread mold, electrical hazards, or recurring flooding may require an on-site professional assessment.